
Sew on patches like a pro by starting with the right tools and a clean workspace, because preparation sets the stage for flawless results and a confident, controlled stitching process that carries through from the very first pin and crease to the final seam, ensuring you don’t skip critical steps such as lint-free contact, fabric stabilization, and even tension, for speed and precision. This guide walks you through patch sewing techniques in depth, from meticulous fabric prep and precise layout to choosing between heat-activated iron-on bases and sturdy sew-on edges, weighing factors like fabric weight, fiber composition, and expected wear to ensure your repair blends with weight and grain and remains durable through repeated washes. Whether you want to sew patches at home or repair worn gear in a dorm room workshop, you’ll learn to select appropriate needles, threads, stabilizers, and seam finishes, so your hand sewing patches or machine stitching holds through tough conditions such as outdoor use, frequent bending, or high-friction areas like knees and elbows. We cover essential tools for patches—pins, fabric clips, a sharp needle or ballpoint needle, sturdy thread, a thimble, fabric scissors, and a dependable machine if you prefer speed—so you can prepare a tidy work area, mark exact stitch lines, and practice clean edge control before you bring the patch to the garment. Finally, this patch application guide offers practical tips for laying out patches, securing them with baste stitches, checking alignment with measurement gauges, and finishing with confidence when you’re ready to wash and wear, including advice on press settings, interfacing behind delicate fabrics, and how to repair mistakes without starting over, and this practical mindset helps you adapt to imperfect patches and varied fabrics without sacrificing a clean finish, while reinforcing the habit of testing on scrap material before committing to a real garment.
Viewed through a broader lens, patching becomes textile restoration and garment embellishment, where fabric patches mend wear while adding personal flair. Think of it as fabric repair techniques that blend decorative stitching with iron-on or sew-on options, plus careful edge finishing to extend a garment’s life and tailor its style. This broader approach fits into DIY wardrobe maintenance, textile mending, and home-based repair workflows, aligning with related terms such as garment repair, stitching for patches, and fabric patching practices to guide decisions and spark creativity.
Sew on patches like a pro: choosing the right method and setup
Starting a patch project with the right method sets the stage for durability and a clean look. Understanding the difference between iron-on patches and sew-on patches helps you pick the approach that best fits the fabric and wear you expect. When you aim for longevity, sew-on patches are typically the most durable option, while iron-on patches can offer a quick fix or be used as a temporary base.
A well-rounded setup begins with the tools for patches: pins or fabric clips to hold the patch in place, a variety of needles for different fabrics, quality thread that matches or complements the garment, sharp scissors, and a thimble for hand work. Having these basics on hand makes the process smoother and aligns with a practical patch application guide you can follow project after project.
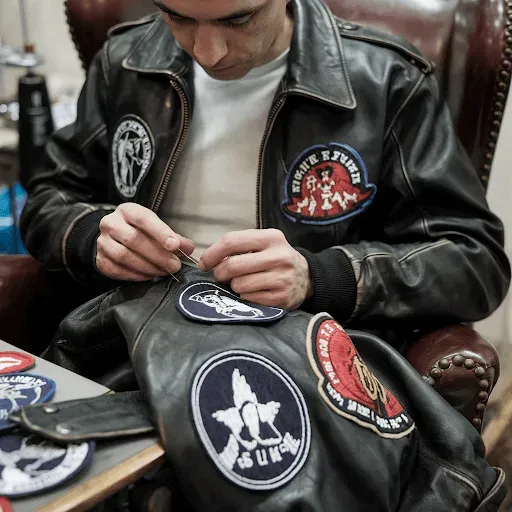
Master patch sewing techniques: hand sewing patches that endure
Hand sewing patches relies on time-tested stitching that resists wear. Key patch sewing techniques include backstitch for a strong edge, running stitch for delicate fabrics, blanket stitch for a neat, reinforced outline, and whip stitch for quick, simple edge binding. Each stitch choice affects edge security and the overall look, so matching the stitch to fabric weight is essential.
Practicing hand sewing patches builds consistency. Denser fabrics tolerate shorter stitches, while lighter textiles benefit from slightly longer stitches to prevent puckering. Starting with a backstitch along the outer edge gives beginners a reliable, durable finish that remains unobtrusive on many styles of patches.
Positioning and stabilizing patches for a flawless finish
Precise positioning saves time and prevents shifting during final stitching. Use pins or clips to secure the patch in the desired location, and consider a light baste stitch around the edge for fabrics that creep or stretch. This approach aligns with the patch application guide, ensuring your patch sits properly before you commit to permanent stitches.
Stabilizing the area is especially important on knits or delicate fabrics. A baste stitch or a small piece of interfacing behind the patch can reduce distortion and curling as you sew. When the placement is set, you can proceed with your preferred stitching method—hand sewing, machine stitching, or a combination—to achieve a clean, durable result.
Sewing patches at home: machine edges and durability
When you sew patches at home, a machine can speed up the process and create uniform edges. Use a zigzag or satin stitch to encase the patch edge and resist fraying, or run a straight stitch just inside the edge for a neat base line and then add a second line closer to the edge for extra security.
For thicker fabrics, a walking foot helps feed multiple layers evenly so the patch stays flat. Color-matching thread can create a seamless look, but contrasting thread can also be used as a decorative edge. Either way, keeping stitches even and consistent is a core part of mastering patch sewing techniques in a home setting.
Fabric-wise patch strategies: denim, knits, cotton, and decorative designs
Different fabrics demand different patch strategies. Denim and other heavy fabrics often benefit from dense backstitching or a tight blanket stitch to keep the patch flat through repeated wear. Cotton and twill respond well to standard backstitch or a light zigzag edge that blends with classic textures.
Knits and stretch fabrics require tension control and, if possible, stabilizing behind the patch with interfacing to reduce distortion. Decorative or embroidered patches can be highlighted with a contrasting edge for a stylish finish, blending patch sewing techniques with personal style while staying durable.
Finishing touches and care: extend patch life with proper care
Finishing touches include trimming stray threads, a light press with a pressing cloth, and a final check to ensure all edges are secured. If you started with an iron-on base, a quick decorative stitch can reinforce the bond and help the patch survive multiple washes, aligning with practical patch application guidelines.
Care and longevity matter. Label the garment with washing instructions that protect adhesives and stitching, and address common issues like curling, puckering, or loose edges promptly. By following the patch application guide and using proper tools for patches, you’ll extend the life of patches and keep them looking intentional, not rushed.
Frequently Asked Questions
Sew on patches like a pro at home: what tools for patches do I need?
Essential tools start with patches (choose iron-on for quick fixes or sew-on for durability), plus pins or fabric clips to hold placement, a selection of needles (sharp for woven fabrics, ballpoint for knits), matching thread, scissors, and a thimble. A sewing machine is optional but speeds up the process and helps with even edges when patching multiple items. Prep the garment by laundering and drying it, then iron the area around the patch and lay out the position with pins as a baseline—this aligns with a reliable patch application guide for consistent results.
What are essential patch sewing techniques for sewing patches at home?
Key patch sewing techniques include backstitch for a durable edge, running stitch for delicate fabrics, blanket stitch for a tidy edge, and whip stitch for light fabrics. If you’re using a machine, a zigzag or satin stitch works well to encase the edge and resist fraying. Match stitch length to fabric weight and maintain steady tension to keep edges neat.
Hand sewing patches vs machine sewing patches to sew on patches like a pro—what’s best?
Hand sewing patches is ideal for delicate fabrics or when you want precise control, while machine sewing offers speed and consistently clean edges on thicker materials. A practical approach is to baste by hand to secure position, then finish with machine stitching for durability, or use hand stitches for the edge and reserve machine work for the main seam.
How do you position and stabilize the patch according to a patch application guide to look professional?
Position the patch precisely, then secure with pins or clips and lightly baste around the edge to prevent shifting. Once you’re confident in placement, proceed with your chosen final stitches—hand or machine—ensuring a neat, flat edge. For stretchy fabrics, consider a small stabilizer behind the patch to maintain shape during stitching.
How do patch sewing techniques vary for denim, cotton, and knits when sewing patches like a pro?
Denim and other heavy fabrics respond well to a dense backstitch or tight blanket stitch to keep the patch flat. Cotton and twill pairs nicely with backstitch or a zigzag edge. Knits and stretch fabrics benefit from stretch-friendly stitches and, if needed, a stabilizer to limit distortion. Embroidered patches can be enhanced with decorative edges while staying within solid patch sewing techniques.
What common issues occur when sewing patches at home and how can you fix them?
Common problems include curling edges, puckering, visible thread, and patches loosening after washing. Fixes include baste edges before final stitching, choose appropriate needle size and stitch length for fabric weight, use a pressing cloth and light iron after sewing, reinforce edges in high-friction areas, and follow care guidelines to protect adhesives or stitches.
| Aspect | Key Points |
|---|---|
| Tools and prep | Gather the right tools and prep the garment. Choose iron-on patches for speed or sew-on patches for durability. Essential items include pins or fabric clips, needles (sharp for woven fabrics; ballpoint for knits), matching thread, scissors, a thimble, and a sewing machine if available. Prep work matters: launder and dry the item, iron the area around the patch, and lay out the patch with pins to ensure consistent placement. |
| Iron-on vs sew-on | Iron-on patches offer speed and easy adhesion via heat; sew-on patches provide the strongest, most durable attachment. For heavily abraded areas (workwear, bags, denim), sew-on tends to last longer. If you start with iron-on, you can finish with sew-on stitches for longevity. |
| Positioning and stabilizing the patch | Place the patch precisely, secure with pins or clips, and consider a light baste stitch around the edge for delicate fabrics. When placement is set, proceed to final stitching by hand, machine, or a combination. |
| Hand sewing patches | Common hand stitches: backstitch (strong edge), running stitch (delicate fabrics), blanket stitch (decorative edge), and whip stitch (simple edge). Match stitch length to fabric weight for a clean edge. Beginners often start with a backstitch along the outside edge for a solid bond. |
| Machine stitching | Use zigzag or satin stitches to encase the edge and prevent fraying. A dense zigzag anchors the edge and resists curling; you can also stitch straight inside the edge and add a secondary line near the edge. For thick fabrics, a walking foot helps keep layers flat. |
| Techniques for different fabrics and patches | Denim/heavy fabrics: dense backstitch or tight blanket stitch. Cotton/twill: backstitch or zigzag edge. Knits/stretch: use stretch-friendly stitches and consider stabilizing with interfacing. Embroidered/decorative patches: highlight with contrasting edge stitches for style. |
| Common issues and fixes | Curling edges: add edge stitches and, if needed, a light iron with a pressing cloth. Thread visibility: match thread to patch/garment or use contrast intentionally. Puckering on thin fabrics: use smaller needles, longer stitches, and baste edges first. Loose patches after washing: reinforce edges with extra stitching. |
| Finishing touches and care | Trim stray threads close to the fabric and give a light press. If you used an iron-on base, reinforce the bond with a decorative stitch. Add care labels or instructions to avoid high heat that could affect adhesives or stitching. |
| Patch application guide in practice | Apply patches with consistency and patience: align, pin, baste, stitch, and finish. This cadence reduces surprises and yields a clean, professional look. The core ideas—proper tool use and stitch choice—apply whether patching at home or on the go. |
| Real-world tips from hobbyists and professionals | Start with an easy project to build confidence, practice on scrap fabric, use an edge guide or foot to keep stitches even when machine sewing, and choose durable thread for items that see frequent washing or wear. |
Summary
conclusion sentence: