
Fabric patches for clothing open up a world of style and practicality, letting you mend, customize, and refresh garments with ease. From repair-minded fixes to bold embellishments, patches can extend the life of a favorite jacket, sweater, or bag. You’ll find options like iron-on patches and sew-on patches, each with its own setup for quick changes or lasting wear. To keep designs looking sharp, follow simple patch care tips and care instructions that preserve color and adhesion. Whether you’re chasing DIY clothing patches or practical patch repairs, this guide helps you apply, style, and maintain patches with confidence.
In other words, the realm of garment embellishments includes textile badges, appliqués, and decorative fabric patches that personalize every item. LSI-friendly terms like patch embroidery, stick-on patches, and fabric badges broaden the vocabulary while preserving the core idea of mending and decorating. Think of it as a spectrum from quick, heat-set options to durable hand-stitched accents on denim or leather, all aimed at extending wear. Whether you call them badges, appliqués, or fabric patches, these approaches empower you to refresh wardrobes with creativity and care. When selecting a method, consider fabric type, heat tolerance, and your maintenance expectations to ensure a lasting result.
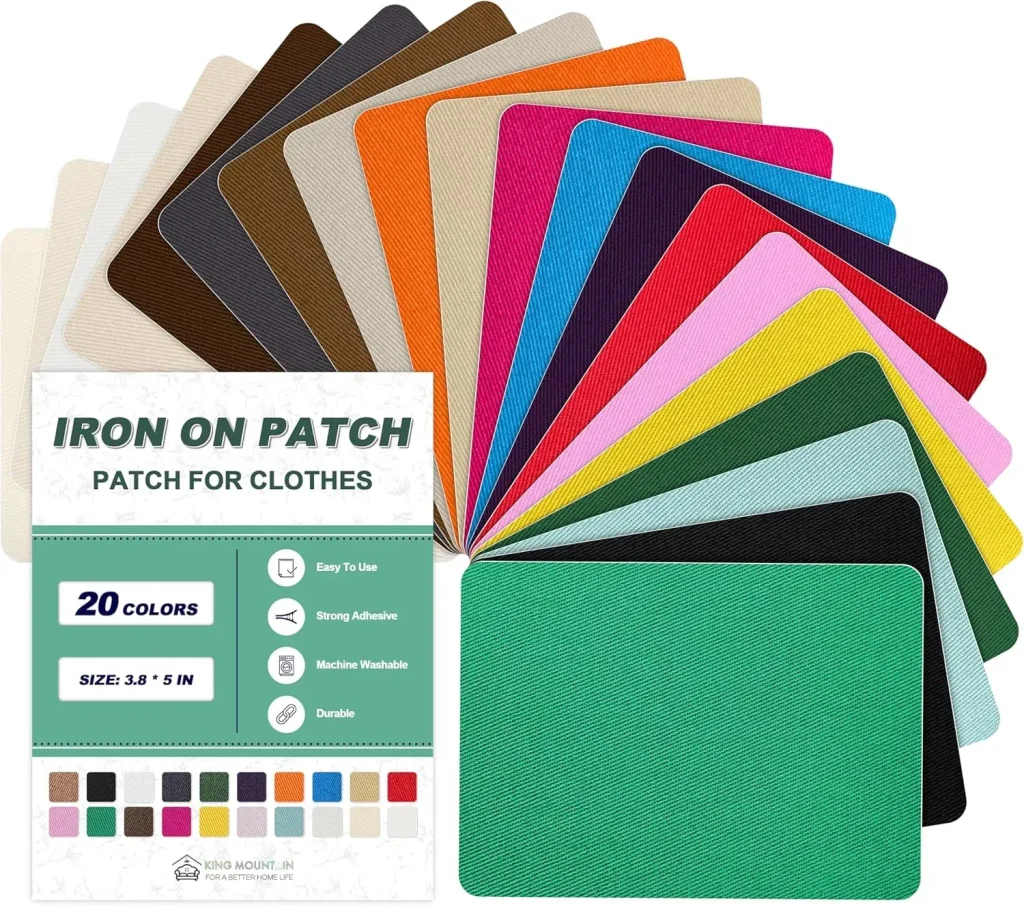
1. Choosing the Right Patch Type for Your Fabric
When selecting patches for clothing, two popular options stand out: iron-on patches and sew-on patches. Iron-on patches use a heat-activated adhesive that makes for a quick placement, ideal for speedy updates or designs on smooth fabrics. The right choice depends on the garment’s material and the level of permanence you want. Iron-on patches can be very durable when applied correctly, but they may not hold as well on heavy sewing fabrics or fabrics with unusual fibers.
Sew-on patches, on the other hand, rely on stitching and don’t depend on heat-activated glue. They tend to perform better on denim, canvas, leather, and other sturdy materials, especially after repeated washing. When deciding between patch types, test a small hidden area first and follow the patch manufacturer’s care instructions. This is a key part of patch care tips to preserve both patch and fabric integrity.
2. Fabric patches for clothing: from repairs to personal style
Fabric patches for clothing start as simple repairs—covering a frayed elbow or reinforcing a worn knee—and quickly evolve into bold fashion statements. By choosing the right patch type and design, you can extend the life of garments while expressing your personality. Patches come in various foods, shapes, and backings, making it easy to turn a practical fix into a focal point of your outfit.
This approach blends utility with DIY fashion. Whether you’re updating a denim jacket, backpack, or shirt, patches provide a canvas for creativity and personalization. Consider how iron-on or sew-on patches complement existing fabrics, colors, and textures, turning patch repairs into stylish, coordinated looks.
3. How to Apply Patches: Iron-On and Sew-On Step-by-Step
Applying patches can be straightforward with clear steps. For iron-on patches, preheat your iron to a no-steam setting suitable for the garment’s fabric, place the patch, cover it, and press firmly for 20-30 seconds. Allow it to cool completely and test by gently tugging; if it isn’t fully adhered, re-press. A final cool wash after setting helps maximize the adhesive bond and is a practical addition to patch care tips.
Sew-on patches require stitching rather than heat. Position the patch, pin it, and stitch around the edge with small, even stitches in a matching thread. A zigzag stitch along the edge or a few stitches across the center add durability. After sewing, knot securely, trim the thread, and allow 24 hours for the patch to set before washing. This approach is especially robust on thicker fabrics and in high-wear areas, aligning with best practices for patch care tips.
4. Patch Care Tips: Extending Life Through Washing and Handling
Maintaining patched garments starts with careful laundering. Turn garments inside out before washing to reduce abrasion on patches, and use cold or warm water on a gentle cycle to extend life. Avoid high-heat drying; air-dry when possible, and if you must use a dryer, select a low heat setting. Regularly inspect patch edges after washing and resew or reglue any areas showing wear, a core component of patch care tips.
For iron-on patches, avoid direct heat when storing the garment to prevent peeling, and consider a light re-press after storage to refresh the bond. With sew-on patches, continue to monitor stitching integrity over time, especially after multiple wash cycles. Following these care guidelines helps ensure patches remain secure and visually cohesive across many wears, reinforcing the practical value of patch care tips.
5. Creative Ideas for DIY Clothing Patches
DIY clothing patches invite experimentation with textures, colors, and themes. Start with plain fabric patches or embroidery designs, then add your own flair through hand-stitching, machine embroidery, or fabric paint. DIY clothing patches enable you to customize items at a fraction of the cost of store-bought options, while also giving you hands-on experience in patch repairs as a creative process.
Think in sets and stories—group patches by travel, music, or hobbies to create a cohesive wardrobe narrative. Combine patches with embroidery or decorative stitches for extra texture, and use iron-on patches for quick updates before reinforcing with sewing for durability. DIY projects like these make patch repairs feel like creative adventures rather than chores.
6. Common Mistakes in Patch Repairs and How to Avoid Failures
Common mistakes in patch repairs include using the wrong heat setting for iron-on patches, skipping tests on hidden areas, and overwhelming a garment with too many patches. These missteps can lead to peeling, stiff fabric, or visible misalignment. Being mindful of both iron-on patches and sew-on patches helps you choose the right method for each fabric type and reduce the need for frequent patch repairs.
To avoid failures, always check fabric care labels and patch instructions, test a hidden area before full application, and ensure edges are securely finished—whether you’re using a heat-based method or stitching. Balancing patch density, respecting fabric tension, and letting patches set properly after application are crucial steps in maintaining garment integrity and achieving durable, stylish patch repairs.
Frequently Asked Questions
What are fabric patches for clothing, and how do iron-on patches compare to sew-on patches?
Fabric patches for clothing are pieces of fabric applied to repair, reinforce, or decorate garments. Iron-on patches use a heat-activated adhesive and are quick to apply, while sew-on patches require stitching for long-lasting security. Both work for patch repairs or style upgrades; just check fabric compatibility and follow patch instructions.
How do I apply iron-on patches on fabric patches for clothing, and what patch care tips should I follow?
To apply iron-on patches on fabric patches for clothing: preheat your iron, place the patch on the desired area with parchment or a thin cloth, and press firmly for 20–30 seconds. Let it cool completely and test adhesion; re-press if needed. For best longevity, wash gently, turn the garment inside out, and avoid high heat when storing.
Which fabrics are best suited for fabric patches for clothing, and when should I use sew-on patches for patch repairs on denim or leather?
Cotton and denim generally respond well to both patch types. Leather or suede often benefits from sew-on backing or professional adhesion because heat can damage delicate materials. For knits and synthetics, review fabric care labels since some iron-on adhesives may discolor or stiffen certain fabrics.
What are essential patch care tips to keep fabric patches for clothing looking good after washing?
Turn garments inside out before washing, use a cold or warm gentle cycle, and air-dry when possible. Avoid high-heat drying and store patches away from direct heat. Regularly inspect patch edges and resew or reglue worn areas as needed.
Can I use DIY clothing patches on my garments, and what basic steps should I follow to apply them safely?
Yes, DIY clothing patches are a fun way to customize garments. Choose iron-on or sew-on options, prepare supplies, and position the patch before applying with heat or stitching. Start with small designs on lighter fabrics to build confidence, and always follow the patch instructions for best results.
What are common mistakes when applying fabric patches for clothing and how can I avoid them to ensure durable patch repairs?
Common mistakes include using the wrong heat setting, not testing a patch on a hidden area, crowding patches, and failing to secure sew-on edges. Avoid them by checking fabric labels, testing first, keeping patch layouts balanced, and stitching edges securely for durable patch repairs.
| Aspect | Key Points | Notes |
|---|---|---|
| Definition | Patches cover, reinforce, decorate, or label garments. | Varied shapes, sizes, fabrics, and backings; aims to repair, strengthen, or express style. |
| Types (Iron-on vs Sew-on) | Iron-on uses heat-activated adhesive; Sew-on uses stitching. | Iron-ons are quick but depend on fabric compatibility; Sew-ons are durable on thick fabrics and frequent washing. |
| Durability & Fabric Compatibility | Fabric choice affects patch performance. | Test on hidden areas; lighter fabrics may need gentler backing; denim/canvas respond well; leather may require leather-friendly backing or professional adhesion. |
| Choosing by Fabric Type | Cotton/Denim: both patch types work; Leather/Suede: sew-on or professional; Knits/Synthetics: check care labels. | Iron-ons may discolor or stiffen some knits; follow patch instructions. |
| How to Apply (Iron-on) | Steps: Preheat iron; place patch; cover with thin cloth; press 20–30s; cool and test; finish with a cool wash. | Follow patch and fabric guidelines; heat settings vary by patch. |
| How to Apply (Sew-on) | Steps: Position and pin; stitch around edge with matching thread; add optional zigzag; knot and trim; set 24h before washing. | Sewing is more durable on high-wear areas. |
| Tools & Materials | Iron/heat source, parchment or thin cloth, sharp scissors, needle, matching thread, pins, optional fabric glue, fusible webbing. | Have ready for reliable results and neat edges. |
| Patch Placement Ideas | Cluster small patches, place a bold patch center back, combine with embroidery, match themes for a cohesive look. | Design can tell a story or reflect hobbies. |
| Care & Maintenance | Turn inside out; wash cold/warm on gentle cycle; air-dry or low heat; resew/reglue worn edges; avoid direct heat when storing iron-ons. | Check edges after washing and resecure as needed. |
| DIY Patches | Budget-friendly customization via plain fabric, embroidery, or repurposed patches; options range from iron-ons to hand/machine embroidery. | Start with light fabrics and small designs to build confidence. |
| Common Mistakes | Wrong heat setting, skipping a test area, too many patches, unsewn edges. | Test on hidden areas; follow instructions; ensure edges are secured. |
| Environmental Benefits | Patching supports sustainable fashion by extending garment life. | Reduces waste and can be cost-effective over buying new items. |
Summary
Conclusion: Fabric patches for clothing are a versatile, budget-friendly, and creative way to mend, personalize, and extend the life of your wardrobe. By understanding the differences between iron-on and sew-on patches, selecting patches suited to your fabric, and following proper application and care steps, you can achieve durable patches that look intentional and stylish. Whether you’re patching a worn elbow, embellishing jeans, or building a cohesive collection of DIY patches, patches empower personal expression while reducing waste. Embrace the patching process as a craft, and you’ll see how small details transform an ordinary garment into something meaningful.