
Remove patches without damaging fabric, a skill that preserves your garment’s integrity while refreshing its look. This guide explains how to remove patches and how to replace patches on fabric with clean edges and minimal residue. You’ll learn step-by-step techniques that protect threads, reduce snagging, and keep textures intact. Across denim, cotton, and knits, the methods focus on preventing fraying and heat damage while you work. With the right tools and patience, you can extend the life of worn garments while maintaining a professional finish.
If you’re exploring patch work on clothing, you’re looking at appliqué removal and fabric restoration techniques that protect weave integrity. Other terms like garment repair, patch application, and textile mending reflect the same goal: neat edges and durable adhesion without harming fibers. sewing patches without damaging fabric is a common concern, and this guidance covers safe removal and secure reattachment using sewing, heat-setting, or adhesive methods suited to the fabric. From denim to knits, these LSI-inspired terms help you navigate related topics and find practical, step-by-step advice that translates into confident patching and longer-lasting clothing.
Frequently Asked Questions
How to remove patches without damaging fabric?
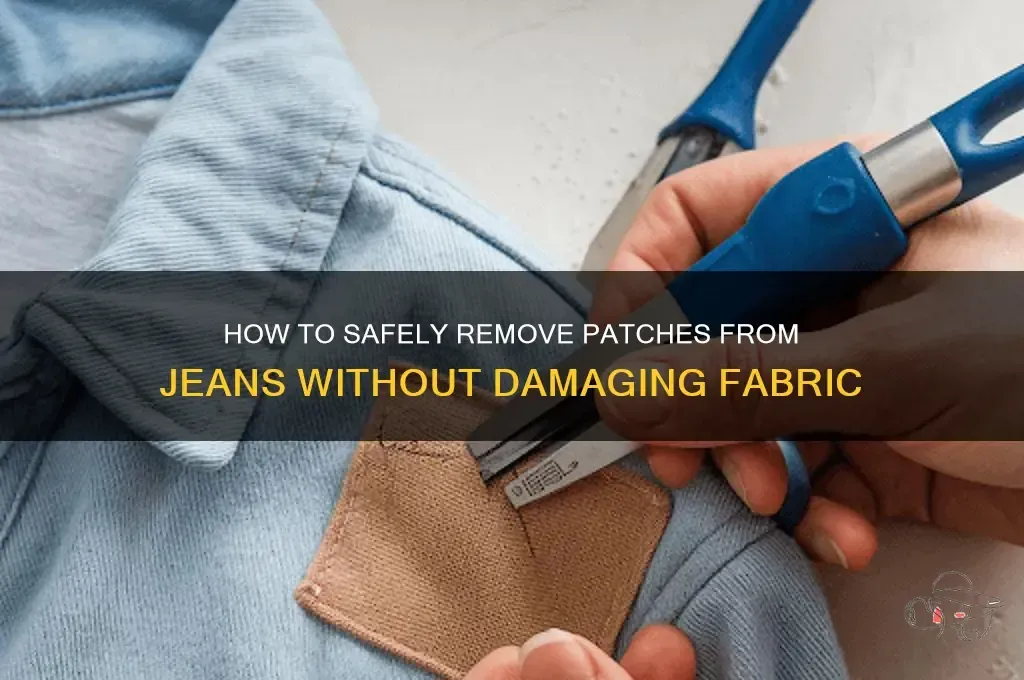
Start by identifying the patch type and protecting the fabric with a pressing cloth. Gently remove stitches around the patch with a seam ripper in small sections. For iron-on patches, lift any adhesive residue with a fabric-safe remover or a bit of warm water and mild detergent, then wipe away. Inspect the area for fraying and trim loose threads. Following these steps helps you remove patches without damaging fabric and leaves a clean surface for a new patch.
What are fabric patch removal tips for removing patches without damaging fabric?
Plan your approach, protect the surface, and remove stitches gradually using a seam ripper and fine tweezers. Work from the edge inward, test for adhesive residue on iron-on patches, and use a gentle adhesive remover if needed. Finally, inspect for snags or creases and prepare the fabric for re-patching.
How to replace patches on fabric?
If you’re learning how to replace patches on fabric, start by choosing a patch that matches the fabric weight and color. Clean and dry the surface, then position the patch and secure with pins. Attach the patch with sewing around the edge, or apply an iron-on backing or fabric glue as appropriate. Finish with a light press and test durability.
What is the best way to sew patches without damaging fabric?
Use a sharp needle and matching thread, and choose stitches that grab the patch edge without pulling the fabric. For delicate materials, use a stabilizer and gentle stitches (such as a small zigzag) near the edge. Keep tension light, sew close to the patch border, and finish with a final press.
What tools do I need for removing patches without damaging fabric?
Essential tools include a seam ripper, small embroidery scissors, fine-point tweezers, an iron and ironing board, parchment paper or a pressing cloth, pins or clips, and needle and thread or a sewing machine. If using glue-backed patches, have fabric glue or fusible web on hand for a secure finish. These tools help remove patches without damaging fabric and prep for replacement.
Do you have fabric patch removal tips for delicate fabrics?
Yes. For delicate fabrics, proceed slowly, use a stabilizer, and avoid high heat. Use gentle seam-ripping with minimal force and test any adhesive removers on a hidden area. Consider hand-stitching around the patch edge when replacing to minimize distortion, and always trim frayed edges carefully.
| Topic | Key Points | Practical Tips |
|---|---|---|
| Introduction | Patches repair wear and add character; removing or replacing patches must preserve fabric integrity and yield a clean, professional finish. | Plan before starting; assess fabric type; aim for neat edges and durable results. |
| Patch Types | Patches can be sewn-on, iron-on, or adhesive-backed. Each type has different removal and replacement considerations. | Identify patch type first to choose the right method and minimize damage. |
| Tools & Materials | Seam ripper, fine-point tweezers, small scissors, iron and ironing board, parchment paper or pressing cloth, stabilizer, adhesive remover, extra fabric, needle and thread or sewing machine, pins/clips, fabric glue or fusible web. | Gather items before starting; have backups for delicate fabrics. |
| Removing Patches (Overview) | Inspect patch edges, protect the fabric, remove stitches carefully, address dense backstitching, remove stubborn threads, check for adhesive residue, and clean the surface after removal. | Work in small increments; use plan; protect fabric with a press cloth; avoid tugging. |
| Replacing Patches (Overview) | Choose a patch that matches the fabric’s color, weight, and weave; prepare the surface; position and secure; attach by sew, iron, or glue; test durability; finish edges. | Align patch with pins/clips; test fit before permanent attachment; ensure proper curing of adhesives. |
| Fabric Tips | Denim/canvas tolerate heavier stitches; cotton/light twill needs gentler handling; knits require stretch-friendly methods; wool/delicate fabrics call for gentle handling. | Match patch weight to fabric; use stabilizers for delicate fabrics; adjust stitch type accordingly. |
| Care After Patching | Let glue cure fully; wash inside-out; air-dry when possible; inspect for loosening edges and re-sew/re-glue as needed. | Follow adhesive guidelines and perform periodic checks to extend patch life. |
| Common Mistakes | Rushing seam ripping, heat damage, leaving adhesive residue, using too-hot irons, or removing a patch from a seam. | Work slowly, protect fabric with heat barriers, test residues on a small area, and avoid excessive heat on synthetics. |
Summary
Table summarized the main ideas and practical steps for removing patches without damaging fabric and replacing patches across different fabrics. The guidance covers types, tools, step-by-step removal and replacement, fabric-specific tips, and care notes to help achieve neat, durable results.