
Screen Printing Design Tips open a practical path from bold ideas to crisp, repeatable prints. Whether you’re new to the process or seasoned, focusing on Artwork prep for screen printing sets the foundation for clean separations and strong ink laydown. From concept sketches to vector files, proper design choices feed into Print-ready films for screen printing, ensuring accurate exposure and sharp edges. Thinking ahead about Color separations for screen printing helps control ink interactions, reduce muddiness, and keep your workflow efficient. With a solid framework that mirrors Screen printing workflow and best practices, you’ll cut waste, improve consistency, and speed up production.
Beyond the headline guidance, the same ideas can be framed with alternative terms like pre-press optimization and garment-focused design planning. Think of this as a structured screen-printing pipeline, covering artwork prep, vector conversion, and color separation iterations that support clean prints. LSI-minded terminology brings in related concepts such as print-ready files, mesh count, exposure, emulsion management, and substrate compatibility to enrich SEO and comprehension. By mapping these connections, designers and printers can align creative intent with production realities, improving consistency and scalability.
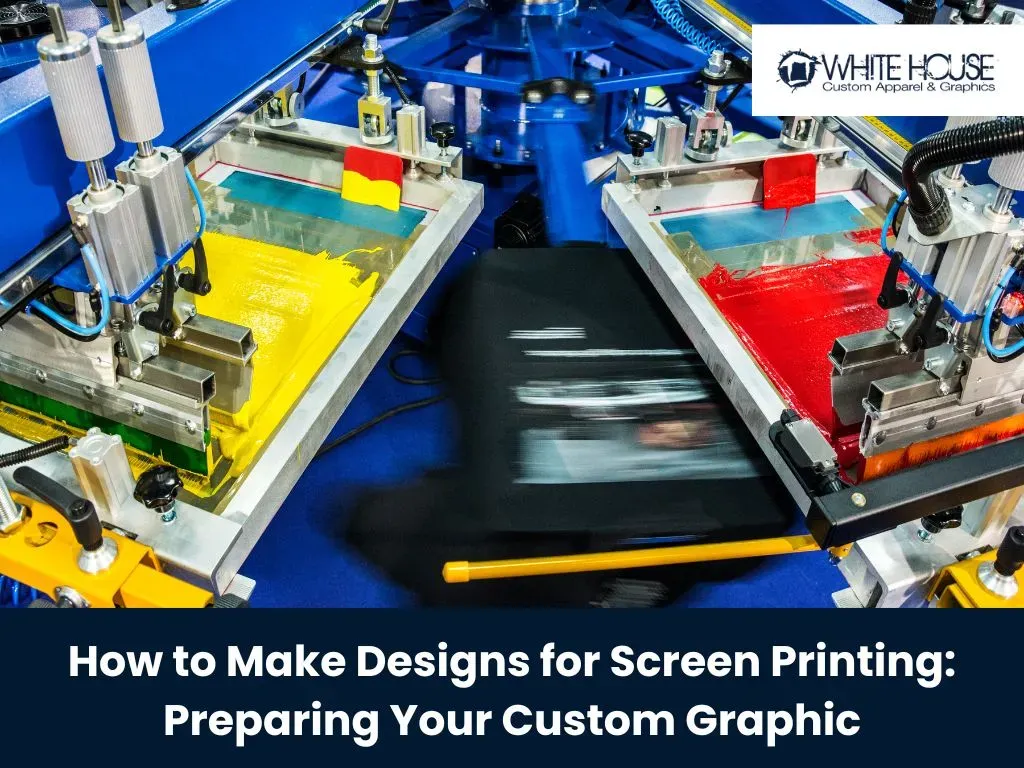
Artwork Prep for Screen Printing: From Concept to Vector Files
Artwork prep for screen printing lays the foundation for every step that follows. By starting with clear concepts, legible typography, and an awareness of mesh count and substrate color, you set yourself up for crisp edges and predictable ink behavior. This stage directly influences how well the design translates to a mesh screen and how easily it will separate into individual color layers.
In practice, aim for scalable vector art whenever possible. Vectors preserve edge definition at any size, which is crucial for clean lines and sharp halftones. If you’re working with raster art, ensure high resolution (typically 300 DPI at final print size) and avoid aggressive compression. Color mode matters too: CMYK is often appropriate when separations align with four-color or spot-color printing, while spot colors can simplify ink matching for limited palettes. Finally, define safe margins and bleed, and plan for separations early so each color can interact predictably during screen setup.
Color Separations for Screen Printing: Balancing Tones, Traps, and Underbases
Color separations are the heartbeat of a successful print, turning a single image into manageable ink layers. A thoughtful approach minimizes color overlap, reduces ink puddling, and ensures smooth deposition across the garment. When planning separations, decide whether you’ll use spot colors or process colors, and align this choice with your mesh count and printing capabilities.
Maintaining color consistency across runs requires a deliberate color management plan. Create swatches or reference sheets, embed notes in the design file, and pay attention to trap and alignment—tiny overlaps can prevent gaps but too much trap muddies the image. Consider underbase logic for dark garments and overprint strategies that simplify registration. If possible, simulate the final print on a garment template to catch surprises before you commit to production.
Print-ready Films for Screen Printing: Quality Bridge to the Press
Print-ready films carry each color separation to the exposure unit, and their quality directly affects fidelity and registration. A strong film output starts with high-contrast black-and-white output and builds through consistent density so that the opaque areas block light reliably during exposure. Poor density control or brittle films can introduce halftone blur and misregistration in the final print.
Attention to film dimensions, margins, and labeling is essential for a smooth workflow. Use quality transparency films to prevent pinholes, ghosting, or faded areas, and maintain uniform film sizes so the team can quickly align registration marks. Don’t skip the test strip: printing a small scale proof helps verify density and line work before committing to a full production run, saving time and material costs.
Screen Printing Design Tips: A Structured Approach to Quality
Screen Printing Design Tips offer a practical framework for achieving repeatable, high-quality results. This guidance emphasizes a disciplined pre-press workflow, clear artwork prep, and careful handling of color separations and film output. By embedding these tips into standard practices, designers and printers can reduce waste, speed up production, and deliver consistent results across runs.
Incorporate standard operating procedures (SOPs), a color-ready library of approved inks and mesh counts, and regular proofs into your process. A well-documented approach helps teams stay aligned from concept to cure, and it makes onboarding new staff straightforward. The emphasis on test proofs, calibration, and diligent record-keeping connects artwork decisions with the final print quality and client satisfaction.
Exposure, Emulsion, and Curing: The Screen Printing Workflow and Best Practices
The exposure, emulsion handling, and curing steps are where design intent becomes durable reality. A robust screen printing workflow and best practices approach requires calibrating emulsions and screens to your mesh count, selecting the right exposure time, and performing careful wash-outs to reveal the image without compromising detail. These decisions impact edge sharpness, halftone fidelity, and long-term washfastness.
Post-exposure care matters too: ensure even ink deposition through tested squeegee angles and flood strokes, and follow curing guidelines precisely for the specific ink and fabric. Proper curing prevents smudging and ensures durability, allowing colors to stay vibrant across multiple washes. Regularly document exposure settings and curing conditions so future jobs can reproduce consistent results.
Common Pitfalls and How to Avoid Them: Proactive Quality Assurance
Even experienced shops encounter pitfalls like misregistration, bleed on porous fabrics, and faded halftones. Proactive measures—such as registering precise alignment marks, selecting appropriate underbase strategies, and controlling ink viscosity—can dramatically reduce rework. Addressing these issues early in the workflow helps maintain consistent densities across colors and garments.
A structured approach to QA—regular proofs, test runs on representative substrates, and meticulous record-keeping—creates a reliable feedback loop. When teams document mesh tensions, emulsion types, and exposure times for each job, they build a knowledge base that speeds up troubleshooting and supports scalable production.
Frequently Asked Questions
How do Screen Printing Design Tips guide Artwork prep for screen printing to improve print quality and consistency?
Screen Printing Design Tips emphasize solid artwork preparation as the foundation. Focus on vector art, correct color modes (CMYK or spot colors), defined safe margins and bleed, and early planning for separations. This disciplined prep reduces misprints, preserves edge definition, and speeds up the pre-press workflow.
In Artwork prep for screen printing, what steps ensure strong Color separations for screen printing?
Begin with clear concepts and legible typography, then choose vector artwork or high-resolution raster art (300 DPI at final print size). Decide on CMYK or spot colors, define safe margins, and plan for separations early. Consider how each color will interact on the garment and how trap and underbase might be used.
Why are Color separations for screen printing critical, and how should you manage trap and underbase?
Color separations translate art into individual ink layers and heavily influence print quality. Manage trap to avoid gaps without creating muddiness, and plan underbase for dark garments where opacity matters. Maintain a color management plan, preview separations on a garment template, and ensure consistent color across runs.
How do Print-ready films for screen printing impact exposure accuracy and final print fidelity?
Print-ready films carry each color separation to the exposure unit, so film quality directly affects fidelity. Use high-contrast output, maintain consistent density, and ensure correct film dimensions and margins. Use quality transparency films, verify registration marks, and run a test strip before full production.
What does a strong Screen printing workflow and best practices look like during the pre-press stage?
A strong workflow includes documented standard operating procedures for artwork prep, film output, exposure, and curing. Regular proofs, equipment calibration, and meticulous record-keeping of mesh counts, emulsions, and exposure times ensure repeatable results and smoother handoffs between design and production.
What common pitfalls in Screen Printing Design Tips should be avoided to ensure repeatable results?
Avoid misregistration, bleed and misalignment on dense fabrics, ink bleed on porous surfaces, faded halftones, and varying densities across colors. Use proper registration marks, test prints, consistent ink viscosity, and confirm curing conditions to maintain print quality across runs.
| Section | Key Points |
|---|---|
| Introduction |
|
| The purpose of Screen Printing Design Tips |
|
| Artwork Prep: From concept to vector files |
|
| Color separations: The heartbeat of your print |
|
| Print-ready films: The bridge between design and print |
|
| Evidence of a strong workflow: Exposure, emulsion, and curing |
|
| Common pitfalls and how to avoid them |
|
| Smart practices for a repeatable process |
|
| Final checks before printing a full run |
|
| The long‑term payoff of Screen Printing Design Tips |
|
| Conclusion |
|
Summary
Conclusion