
For crafters and entrepreneurs looking to bring creativity home, the Home screen printing studio setup offers a practical, efficient space that turns ideas into finished pieces while supporting early experiments, safe storage, and future expansion as your projects grow; it should also be adaptable to different workflow styles, from tight, minimalist setups for solo projects to more generous layouts that invite collaboration, demonstrations, and learning sessions. A well-chosen collection of screen printing equipment forms the backbone of your workflow, balancing quality with budget concerns, while providing dependable performance for small runs, at-home prototyping, and weekend creative sessions, and it should also integrate with safe handling routines and easy maintenance, reliability, or ease. Whether you’re building a DIY screen printing studio in a spare room or a garage corner, smart zoning, ventilation, and storage help you stay organized, reduce cross-contamination, and keep essential tools within easy reach during long print sessions, while also supporting a positive, inspiring working atmosphere. A thoughtful home print shop layout reduces wasted motion, keeps inks separated, and makes it easier to scale as you add color or garment types, while permitting smooth transitions between design work, coatings, printing, and curing, and it benefits from clearly marked zones, accessible power outlets, and durable, easy-to-clean surfaces. Explore screen printing workspace ideas that fit your space while staying within a budget, and plan a budget screen printing setup that grows with you. This approach keeps the room flexible for future equipment upgrades and class-style sessions.
Beyond the basics, the concept translates well to an at-home printing workshop where practical zoning, proper ventilation, and clean signage support steady results. A compact, dedicated craft space acts as a personal production corner, enabling fast prototyping, color tests, and safe drying without disrupting daily life. Framing the setup as a small business-friendly home studio helps you plan budgets, workflow, and scalability while communicating clear expectations to collaborators or family.
Essential Screen Printing Equipment for a DIY Studio
Equipment is the backbone of any Home screen printing studio setup. The core pieces — a sturdy printing press, multiple screens with different mesh counts, and reliable emulsions — define what you can accomplish. When selecting screen printing equipment, prioritize build quality, versatility, and how well it fits your room and budget. A 9×12 inch platen works for small designs, while 15×15 or larger expands your possibilities. In a DIY screen printing studio, you’ll appreciate gear that’s durable, supports quick color changes, and tolerates a modest footprint.
Choose inks and additives mindful of ventilation and cleanup. Water-based inks simplify cleanup in a home environment, and a good reducer helps dial viscosity. Curating your toolset around screen printing equipment that you can maintain, degreaser for screens, exposure unit, washout station, and a drying area keeps your workflow predictable and scalable in a small space, reinforcing the DIY screen printing studio ethos and reinforcing the home print shop layout strategy.
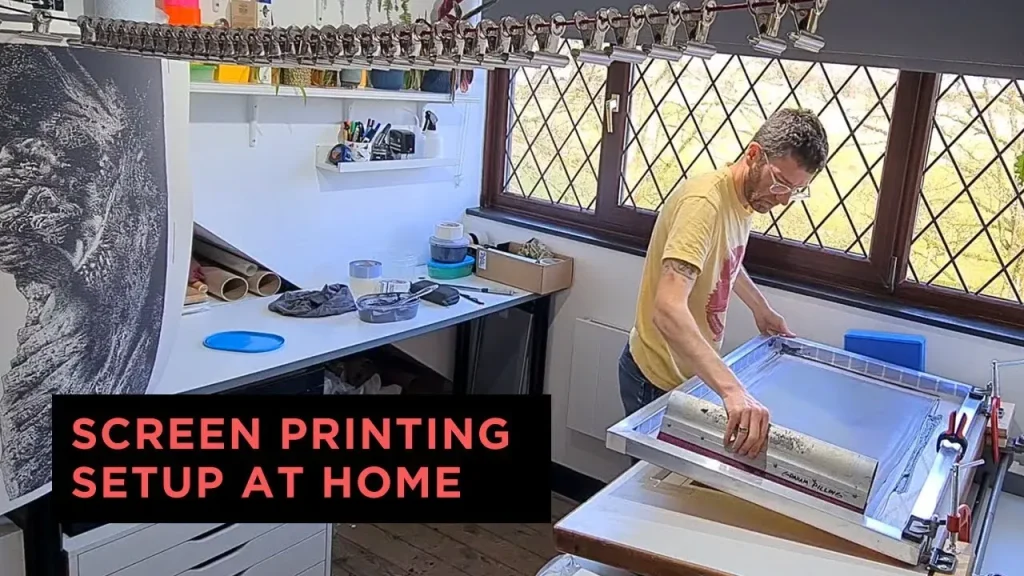
Home screen printing studio setup: Designing a Practical Home Print Shop Layout
Designing the space around a practical home screen printing studio setup means mapping zones: design prep, coating and drying, printing, and curing or packaging. The goal is to create a smooth flow that minimizes backtracking and keeps ink colors contained. When you think about the home print shop layout, consider how every zone relates to the others and how you’ll move between them without collisions or spills. A well-planned layout reduces wasted motion and helps you deliver consistent results.
Lighting and ergonomics matter: use a mix of ambient room light and task lighting above the printing table, and set the work surface height to suit a seated or standing workflow. This is where screen printing workspace ideas come to life in a compact setting: add a pegboard for tools, assign color-coded trays for inks, and separate wet versus dry tasks to keep the air cleaner and the space calmer.
Workflow and Zone Planning: Screen Printing Workspace Ideas for Efficiency
Establish a clear workflow with well-defined zones to support a steady rhythm—design preparation, screen coating and drying, printing, and curing or packing. Adopting screen printing workspace ideas like a linear or U-shaped layout helps minimize cross-contamination and makes training new helpers easier, especially in a DIY environment.
Invest in adjustable lighting for color accuracy and use a clean, washable mat at the printing station. Keep a visible reference for your screen tensions, mesh counts, and exposure times to ensure repeatability and reduce mistakes in future runs.
Budget Screen Printing Setup: Start Small and Grow
Budget Screen Printing Setup: Start Small and Grow. Begin with a compact, reliable press and a handful of screens to validate your process and your space. You don’t need studio-level gear to begin; a basic starter kit can fit a coffee-station-size corner and still produce good results. This approach aligns with a budget screen printing setup that respects space, budget, and local regulations.
As you generate revenue or gain confidence, expand gradually: add more screens, an exposure unit, and a drying rack. Upgrading should come in logical steps that improve efficiency without overwhelming your room or budget. In time, your home print shop layout will evolve with your growth, while staying within a realistic budget.
Step-by-Step Setup: Building Your Home Screen Printing Studio
Step-by-Step Setup: Building Your Home Screen Printing Studio. Start by measuring the space, sketching zones, and listing core equipment: a press, a few screens, emulsion, and ink. With careful planning, you can assemble a practical DIY screen printing studio that fits your space and budget.
Next, assemble a dedicated ink area and a wash station, then set up a drying area. Establish a color-coded system for screens in use, drying, and completed prints. This practical sequence mirrors the real-world flow you’ll use, and it provides a reliable blueprint for future projects.
Maintenance, Safety, and Best Practices for a Safe Home Studio
Maintenance, Safety, and Best Practices for a Safe Home Studio. Keep pre-print prep consistent by verifying artwork separations and coating times, and maintain a simple cleaning routine after each session. A predictable routine protects print quality and reduces surprises later.
Prioritize safety with gloves, eye protection when handling solvents, and proper ventilation. Schedule regular maintenance for your exposure unit and squeegees, and document your settings to reproduce results. A well-maintained space reduces odors, extends gear life, and supports a healthier DIY screen printing studio environment.
Frequently Asked Questions
What are the essential components of a Home screen printing studio setup for a small space?
Key equipment includes a reliable press, a few screens with different mesh counts, emulsion and capillary film, an exposure unit, a washout station, water-based inks, squeegees, and a drying/ventilation setup. Organize these around a clear workflow on a sturdy worktable to maximize space and minimize mess.
How can a home print shop layout optimize efficiency in a Home screen printing studio setup?
Adopt a zone-based, linear workflow: design preparation, coating and drying, printing, and curing in sequence to reduce backtracking. Provide adequate lighting, ergonomic table height, and a dedicated wash/cleanup area to support smooth screen printing workspace ideas.
What budget considerations should guide a budget screen printing setup for a DIY screen printing studio?
Plan in tiers: a basic starter kit with a compact manual press and a few screens, a mid-range setup with more screens and an exposure unit, and a growth setup with a second press and ventilation. Focus on long-term investments, warranties, and parts availability to keep costs predictable.
How can I prevent cross-contamination and maintain a clean workflow in a DIY screen printing studio within a Home screen printing studio setup?
Use color-coded trays and zones for screens in use, drying, and finished prints, and keep inks and tools isolated in a dedicated area. A separate wash station and careful layout help sustain a clean, repeatable workflow.
What safety and maintenance practices should I follow in a home print shop layout to support a safe Home screen printing studio setup?
Wear gloves and eye protection when handling inks and solvents, ensure good ventilation, and establish a routine cleaning schedule for screens, squeegees, and the wash area. Regularly inspect equipment like exposure units for safe operation.
What is a practical roadmap to start a budget screen printing setup in a Home screen printing studio setup?
Week 1: define goals, measure space, and buy essential equipment. Weeks 2–4: add screens and colors, refine layout based on initial prints, and set up a drying and wash station. Month 2: upgrade lighting and ventilation as needed, and consider a small exposure unit.
| Aspect | Key Points | Notes / Examples |
|---|---|---|
| Overview | A well-planned home studio improves workflow, reduces mess, and ensures consistent prints. | Fits any space and budget. |
| Equipment Essentials | Printing press, screens/frames, emulsion/capillary films, exposure unit & washout, inks, squeegees, cleaning/ventilation, worktable & storage. | Consider mesh counts, budget, and safety. |
| Layout Ideas | Zone-based workflow; clear traffic flow; adequate lighting; ergonomic work surface; containment and cleanliness. | Minimize movement and cross-contamination. |
| Step-by-Step Setup | Measure space; select core equipment; set up ink area; drying/curing area; wash station; system for clean vs. messy work; safety routines. | Create a repeatable sequence. |
| Budgeting & Space | Budget tiers; space optimization; multi-use spaces; long-term investments. | Garages, spare rooms, warranties, and parts availability. |
| Workflow & Best Practices | Pre-print prep; ink management; consistency/repeatability; cleaning; safety. | Document settings for reproducibility. |
| Getting Started Roadmap | Week 1 goals + space measurement + essential equipment; Week 2–4 expand; Month 2+ upgrades. | Add drying rack, better lighting, or wash station. |
Summary
Home screen printing studio setup enables hobbyists and small studios to create high-quality prints with greater consistency and less mess. This descriptive summary explains how reliable equipment, a thoughtful layout, and a repeatable workflow come together to maximize efficiency in your workspace. By organizing distinct zones for design, coating, printing, and curing, maintaining good lighting and ventilation, and starting small with scalable upgrades, you can grow your home print operation without needing a traditional shop. With careful planning, your Home screen printing studio setup supports creativity, safety, and long-term success, whether printing tees, artwork, or teaching workshops.