
Custom embroidered patches bring branding to life with texture, durability, and a tactile presence that digital prints can’t match, making them a trusted option for teams, creators, and apparel lines seeking a tangible identity. Whether you’re designing a mascot, a corporate emblem, or a fashion statement, this approach adds character while ensuring the design remains legible and wearable across fabrics, applications, and garment types. The embroidered patches design should balance visibility, legibility, and durability across sizes, fabrics, and finishes, taking into account thread luster, backing stability, and edge treatment. The patch embroidery process translates artwork into stitch instructions that sewing machines can interpret, optimizing density, underlay, satin borders, and fill stitches to achieve crisp lines without bulk. This primer outlines the custom patch creation workflow and how careful material selection and color strategy support cohesive branding through logo patches, team insignia, and merchandise.
Beyond the phrase custom embroidered patches, this topic can also be described as sewn-on emblems, stitch-based insignias, or textile badges that convey identity while withstanding regular wear. Such terminology reflects an LSI-driven approach, linking related concepts like fabric embellishments, backing options, and color fastness to the broader idea of brand storytelling through apparel. If you’re evaluating a vendor or planning a line, these alternate terms help you discover resources, techniques, and case studies that reinforce consistent craftsmanship and storytelling.
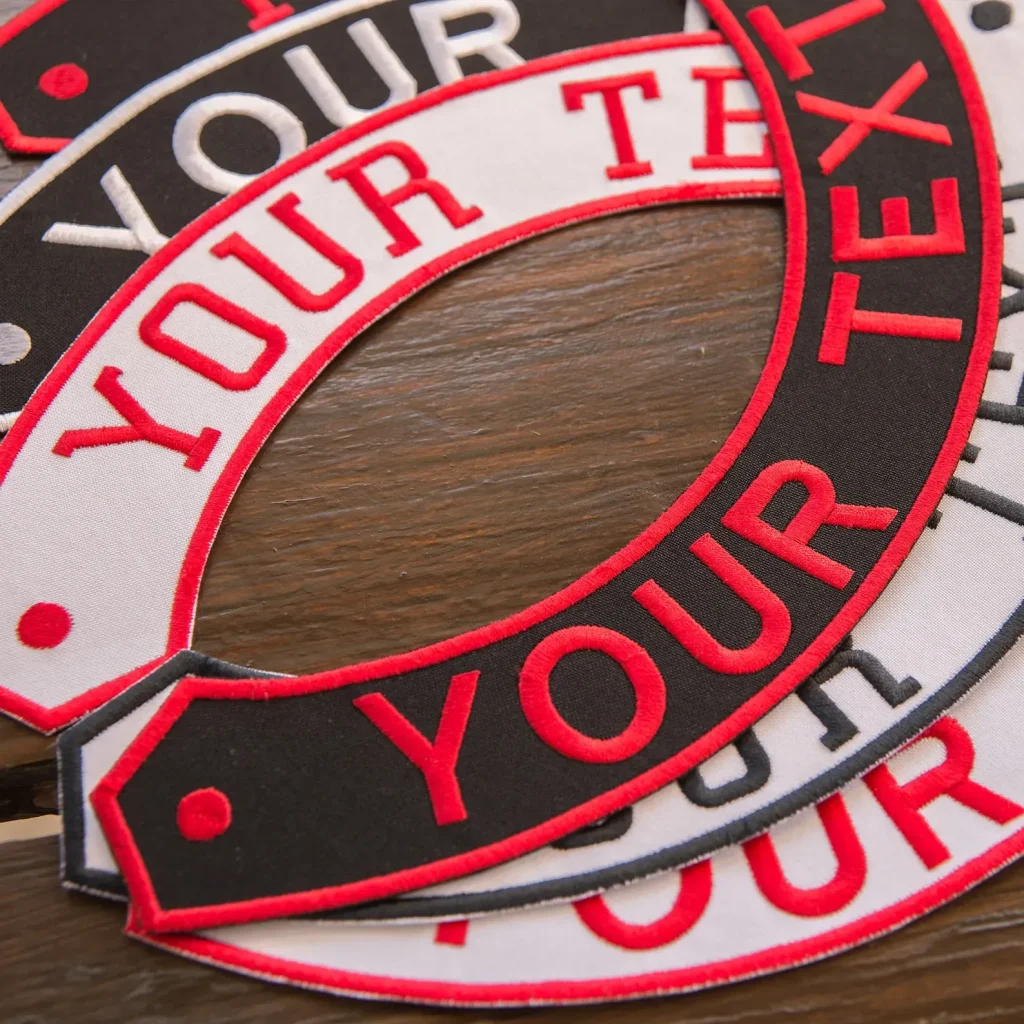
From Concept to Creation: The Core of Custom Embroidered Patches
Creating custom embroidered patches begins with a clear concept that translates into a design suitable for embroidery. In the world of embroidered patches design, early decisions about size, motif, and legibility set the foundation for a durable, recognizable product. By considering how the patch will look from a distance and how it scales across various applications, designers ensure the final piece communicates the intended story without losing detail as sizes change. This planning stage directly influences the patch embroidery process, guiding choices about backing, thread, and edge finishing to preserve the concept from idea to wear-ready patch.
From the initial sketches to vector-ready artwork, the path to a strong patch hinges on translating concept into scalable art. Vectorization preserves clean lines at any size, while a thoughtful color strategy aligns with branding and production realities. Pantone-based color mapping helps maintain consistency across batches, and the digitizing phase converts artwork into stitch instructions that drive the patch embroidery process. The result is a design that remains faithful to the original concept while meeting the practical demands of production and wear.
The Artistry of Embroidered Patches Design: Color, Detail, and Scale
Embroidered patches design blends artistry with technical constraints to achieve legible, compelling results. Vector artwork provides a scalable canvas for clean lines, bold shapes, and balanced composition, which is essential for logos and emblems that must read clearly on uniforms or accessories. Color strategy then maps those shapes to thread hues, considering how embroidery sheen and stitch interaction affect the final look of logo patches and related designs.
Color selection isn’t just about matching a palette; it’s about anticipating how threads behave in embroidery. Designers evaluate shade warmth, contrast, and edge definition, knowing that stitch types—satin for outlines and letters, fill stitches for shapes, and underlay for stability—shape the finished patch. This thoughtful approach to embroidered patches design ensures the artwork remains impactful across sizes and fabrics, while supporting consistent branding.
The Patch Embroidery Process: Digitizing to Finishing
Digitizing serves as the bridge between design and production, translating vector art into stitch instructions that guide the sewing machines. In the patch embroidery process, stitch order, density, and type must balance fidelity with durability, so the patch holds up to wear and washing. A well-digitized file optimizes underlay, satin edges, and fill stitches, producing a crisp outline and robust surface that remains legible across different garment types.
From there, attention shifts to backing and edge finishing. The chosen backing—iron-on for quick application or sew-on for long-lasting wear—affects installation, durability, and care. Edge finishes like merrowed borders or laser-cut edges define the patch’s silhouette and weight, influencing both aesthetics and the embroidery’s interaction with fabric. Each decision in the patch embroidery process contributes to a final product that looks great and performs reliably.
Materials, Backings, and Edge Finishes: Crafting Durable Custom Patch Creation
Material choices—fabric base, stabilizers, and embroidery threads—drive texture, thickness, and wear resistance in custom patch creation. Polyester threads offer colorfastness and economy, while rayon threads provide a premium sheen that elevates logo patches. The fabric base can vary from durable twill to luxe fabrics like felt, with stabilizers ensuring the design remains stable during stitching and shaping. These materials collectively shape the patch’s presence, weight, and durability for branding campaigns, team gear, or merchandise.
Backings and edge finishes are more than installation details; they define usability and longevity. Iron-on backings deliver easy application, sew-on backings ensure long-term durability, and Velcro backs enable removable branding for uniforms or performance gear. Edge options—merrowed borders for a clean, finished look or laser-cut edges for a modern silhouette—alter the patch’s footprint and wear over time. Together with edge finishing, these choices impact production cost, turnaround, and how the patch communicates its story.
Quality Assurance, Prototyping, and Planning for Custom Patch Creation
Quality control throughout the patch creation process ensures every patch stands up to real-world wear. Field tests across different garment types reveal how patches perform after washing, bending, or flexing. Inspecting stitching density, edge stability, and color consistency under varied lighting helps identify issues early. A robust quality assurance routine reinforces confidence in logo patches and other embroidery projects, delivering a dependable final product.
Prototyping and clear cost planning are essential to successful custom patch creation. Early prototypes test stitching, backing performance, and color accuracy, while digitizing and setup costs shape the overall price. Understanding lead times and batch economics enables teams to plan effectively, align expectations with manufacturers, and reduce risks associated with complex designs or large runs. This disciplined approach helps ensure patches arrive ready for branding campaigns, events, or merchandise launches.
Applications Across Brands and Groups: From Logos to Merchandise with Logo Patches
Custom embroidered patches have broad applicability across brands, teams, clubs, schools, and creators. Logo patches identify members, celebrate achievements, or brand apparel with a distinctive, durable emblem. Whether on jerseys, caps, bags, or accessories, well-crafted patches reinforce identity and unity while withstanding the rigors of daily wear.
In fashion and art-driven projects, patches become portable branding and collectible art. Designers often pair a concise central motif with legible typography and a cohesive color story to tell a story that travels with the wearer. By prioritizing branding consistency and thoughtful material choices, patches become more than decoration—they become ambassadors that travel across outfits and activities.
Frequently Asked Questions
What are custom embroidered patches and where are they commonly used as logo patches?
Custom embroidered patches are durable fabric badges created through the patch embroidery process to uphold a brand, team, or project identity. They translate a concept into a tangible logo patch that wears well and reads clearly from a distance. Typical applications include uniforms, jackets, bags, hats, and merchandise where texture and stitching convey quality.
How is the embroidered patches design developed from concept to artwork in a custom patch creation?
Embroidered patches design starts with a concept brief, then moves to vector artwork and a color strategy, mapping colors to thread shades (often with Pantone guidance). The digitizing step converts the artwork into stitch instructions, balancing fidelity with durability to prepare for the patch embroidery process in a reliable custom patch creation.
What are the key steps in the patch embroidery process from artwork to finished patch?
Key steps include digitizing the design, selecting stitch types (satin for borders and letters, fill for shapes), applying underlay for stability, and setting stitch density. Then backing selection and edge finishing are chosen to suit the garment, followed by quality checks and finishing touches to ensure a sharp, durable result.
What backing options and edge finishes should I consider for custom embroidered patches?
Backing options such as iron-on, sew-on, or Velcro affect ease of application and durability. Edge finishes like merrowed borders or laser-cut edges influence appearance and bulk. Each combination interacts with the embroidery process and final look of the patches.
What factors influence cost and lead time for logo patches or custom patch creation?
Costs and lead times depend on patch size, total stitch count, backing type, color complexity, and order quantity. Design complexity and the need for prototypes can add setup or digitizing charges, so early collaboration with designers and manufacturers helps set realistic timelines.
How do material choices and finishing touches affect the quality of custom embroidered patches?
Material choices—fabric base, stabilizers, and embroidery threads—determine texture, weight, and durability. Polyester threads are colorfast and economical, while rayon offers a premium sheen; the fabric base can range from twill to felt. Finishing touches and packaging complete the presentation and protect the patches through use.
| Aspect | Key Points | Details |
|---|---|---|
| Concept to Creation | Idea reflection; legible from distance; color balance; scalable; early decisions on size, detail, backing | Translate concept into an embroidery-ready design that preserves the original idea. |
| Design Translation | Vector artwork; color strategy; Pantone alignment; digitizing for stitch instructions | Convert rough sketches to scalable vectors; map colors to thread; prepare stitch plans. |
| Embroidery Process | Digitizing; stitch order and density; common stitches (satin for borders/letters, fill for shapes, underlay) | Balance visual fidelity with durability; avoid overly dense areas; ensure crisp edges. |
| Backings & Edges | Iron-on, sew-on, and Velcro backings; edge finishes (merrowed or laser-cut) | Attachment method affects ease, wear resistance, and final appearance. |
| Materials, Threads, Stabilizers | Base fabrics, stabilizers, and embroidery threads; polyester vs rayon | Material choices influence texture, weight, durability; prototype iterations advised. |
| Quality Assurance & Finishing | Field tests, stitching density, edge stability, color consistency | Finishing touches include precise cutting, secure backings, heat sealing, and packaging. |
| Cost & Lead Time | Pricing factors: patch size, stitch count, backing type, number of colors; batch effects | Plan early; larger runs reduce unit costs but design complexity can affect setup fees and digitizing charges. |
| Applications & Markets | Uses across logos, sports teams, clubs, corporate branding, and merchandise | Design for legibility and storytelling across apparel, bags, and accessories. |
| Prototyping & Iteration | Structured prototyping; feedback loops; minimizes costly revisions | Concept brief → digital test → prototype → iteration based on end-user feedback. |
| Best Practices & Workflow | Clear objectives; vector design; mindful color choices; digitizing; backing; testing; documentation | A practical, repeatable workflow ensures consistent branding and quality across runs. |
| Conclusion | Summarized process and benefits | From concept to completion, high-quality patches deliver durable branding and storytelling. |
Summary
Custom embroidered patches are durable ambassadors of a brand’s story, combining design finesse with technical craftsmanship to endure washing and wear. This overview highlights how concept, design, digitizing, backing, materials, and quality control come together to produce patches that communicate identity and stand the test of time. By following best practices in vector design, color planning, stitch balance, and finishing, brands, teams, schools, and creators can bring ambitious patch ideas to life that look great, last long, and reinforce brand storytelling across apparel and merchandise.