
Choosing between 3D embroidery vs flat embroidery can significantly affect the look, feel, and durability of a project. The right choice depends on the design, the fabric, the intended use, and how much texture you want to add, whether you lean toward 3D embroidery techniques or flat embroidery techniques. This guide breaks down what each method offers, which techniques are involved, and practical tips, including an embroidery stitch comparison, to help you decide which path to take for your next project. If you are new to embroidery or refining an existing skill set, understanding the differences between 3D embroidery techniques and flat embroidery techniques will empower you to plan more effectively and achieve professional results. From puff embroidery to legible text, you’ll see how texture, durability, and care intersect with design goals across 3D embroidery projects.
From an alternative viewpoint, you can describe the topic using terms like dimensional stitching versus flush surface designs, emphasizing how depth affects fabric interaction. This approach aligns with Latent Semantic Indexing (LSI) by linking concepts such as elevated embroidery, puff embroidery, raised motifs, and traditional flat embroidery techniques that influence legibility and care. If the goal is bold branding with texture, designers often pursue three-dimensional embroidery projects that use underlays and padding to create height and drama. For cleaner, durable results suitable for frequent washing, flat embroidery techniques offer a low-profile, reliable option that remains crisp across fabrics.
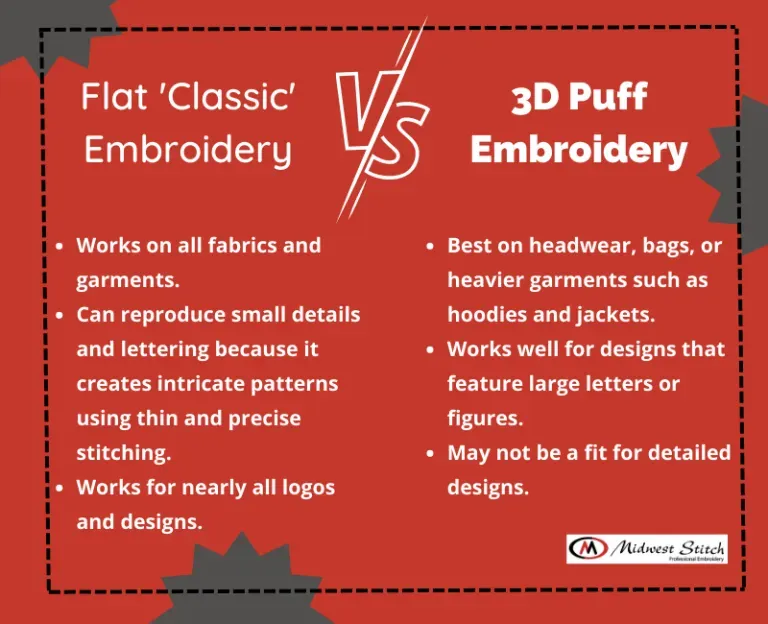
3D embroidery vs flat embroidery: Texture, durability, and design impact
Choosing between 3D embroidery and flat embroidery can dramatically alter how a design looks and feels on fabric. 3D embroidery techniques add height and tactile interest by layering stitches and using underlays like foam, which makes logos and lettering pop from the surface. This dimensional approach is often paired with puff embroidery to create a pronounced silhouette that reads clearly from a distance. In contrast, flat embroidery techniques deliver a smooth, flush finish that emphasizes clean lines and precise edge definition, offering a low-profile aesthetic that remains durable across many fabrics.
For designers evaluating 3D embroidery projects, the texture and float of the raised elements can command attention and brand recognition. Flat embroidery techniques, however, tend to wear more predictably under frequent washing and abrasion. Understanding how design intent, fabric type, and end-use influence durability helps you choose the right approach. When testing concepts, consider both puff embroidery elements and traditional flat fills to determine which look delivers the best balance of visibility and longevity.
3D embroidery techniques: building depth with underlays, padding, and layered stitching
3D embroidery techniques rely on deliberate underlays and padding to create height. Foam or other stabilizers sit beneath the stitches, guiding the threads into a raised profile that enhances visibility and texture. Layered stitching—often combining satin stitches for bold lettering with decorative fills—further increases volume and adds tactile dimension, making each element feel distinct from the fabric.
Choosing the right underlay and thread types is essential for achieving consistent height across a design. Heavier or glossy threads can intensify the dimensional look, while careful color selection enhances depth and readability. When planning 3D embroidery projects, consider how the elevation will interact with movement and laundering—height that flattens or shifts over time can undermine the intended effect.
Flat embroidery techniques: achieving a smooth, low-profile finish for versatility
Flat embroidery techniques emphasize a flush surface where stitches lie close to the fabric. This approach relies on precise stitch paths, balanced tension, and carefully chosen stabilizers to prevent puckering and maintain a crisp silhouette. Satin stitches, fill stitches, and running stitches are commonly used to cover the design area without creating pronounced height, resulting in a sleek, durable finish suitable for a wide range of fabrics.
Because flat embroidery is less bulky, it tends to be easier to wash and wear, making it a practical choice for everyday garments, corporate uniforms, and items requiring predictable care. The versatility of flat techniques also lends itself to high-volume production where consistency and legibility matter, especially for small logos or intricate lettering that must remain sharp at various sizes.
Puff embroidery and underlay strategies: boosting dimension without overdoing texture
Puff embroidery focuses on height achieved through strategic underlays and stitching sequences that push threads upward. By combining foam underlays with dense satin stitches, designers create a raised look that enhances key elements like letters and symbols. Puff embroidery is a hallmark of 3D effects and is often paired with vibrant threads to maximize contrast and visibility.
Effective underlay strategies balance height with fabric integrity. Too much padding can cause distortion or undue stiffness, while too little may fail to achieve the desired puff. Testing variations on a sample swatch can help you refine underlay thickness, stitch density, and color layering to ensure the final project maintains both dimension and wearability.
Embroidery stitch comparison: selecting satin, fill, and running stitches for 3D vs flat results
An embroidery stitch comparison highlights how different techniques influence texture, height, and legibility. In 3D designs, satin stitches may be stacked or layered with decorative fills to create bold, raised shapes, while exact underlays shape the ultimate profile. Flat embroidery often relies on even satin or fill stitches laid flush with the fabric surface to maximize smoothness and contrast.
Understanding how running stitches or outline stitches interact with underlays helps prevent bulk and shadowing in both methods. For 3D projects, plan stitch order and overlap carefully to preserve readability, particularly for small text. For flat designs, ensure consistent stitch length and tension to maintain a uniform surface that reads clearly from a distance.
Practical tips for choosing between 3D embroidery projects and flat embroidery projects
When deciding between 3D embroidery projects and flat embroidery projects, start with the end-use and audience. If a bold, attention-grabbing logo or motif is desired, 3D embroidery with puff elements can create a strong brand signature on caps, jackets, or bags. For items that require subtlety, durability, and easy care across fabrics, flat embroidery projects often provide the most reliable result.
To optimize results, test on the actual fabric with representative stabilizers, threads, and hoop tension. Document the stabilizer choice, stitch density, and color variations to build a reference library for future 3D embroidery techniques or flat embroidery techniques. This disciplined approach helps you replicate professional outcomes across different projects and clients.
Frequently Asked Questions
What is the difference between 3D embroidery and flat embroidery?
3D embroidery adds dimension with underlays and padding (puff embroidery is a common example), creating a raised surface. Flat embroidery lies flush with the fabric. This difference affects texture, visibility from a distance, and care requirements between 3D embroidery techniques vs flat embroidery techniques.
Are 3D embroidery techniques more durable than flat embroidery techniques?
Durability depends on fabric and care. 3D embroidery often uses heavier underlays and taller stitches, which can trap lint and require gentler washing. Flat embroidery tends to wear well and is easier to care for on everyday garments and items.
In what situations is puff embroidery (a 3D embroidery technique) preferred over flat embroidery techniques for logos?
Puff embroidery is ideal for bold branding and high-impact texture on caps, jackets, and bags where the logo needs to pop and read from a distance. It works best on sturdy fabrics and when the design isn’t overly fine or dense.
How do embroidery stitches compare between 3D embroidery stitches and flat embroidery stitches?
3D embroidery stitches rely on layered satin and fill stitches plus an underlay to create height and texture, producing a pronounced silhouette. Flat embroidery stitches are flush with the surface, using satin and fill stitches for even coverage and crisp details.
What practical tips help you succeed with 3D embroidery projects and flat embroidery projects?
Stabilization and hoop tension are key for both. For 3D projects, plan the underlay and thread choices to maximize height and depth; for flat designs, focus on contrast, smooth stitching, and legibility. Always test sew on the actual fabric and follow appropriate care instructions.
How do you decide which method to use based on fabric, usage, and care requirements?
Evaluate design goals, fabric type, intended use, and maintenance. Use 3D embroidery projects for bold textures on sturdy fabrics when you want a standout look, and choose flat embroidery techniques for versatile, low-profile finishes with easier care and longer wear.
| Aspect | Key Points |
|---|---|
| 3D embroidery overview | Adds dimension and tactile interest by layering stitches and using underlays/padding, often called puff embroidery. |
| Underlay and padding | Foam or lightweight stabilizers create the raised profile; height depends on underlay choice. |
| Layered stitching | Multiple stitch types build volume (e.g., satin stitches for chunky letters; decorative fills for texture). |
| Thread selection | Heavier or glossy threads (polyester, rayon) enhance dimension and depth; color choices boost depth. |
| Maintenance considerations | Raised texture may trap lint; care instructions should reflect use case. |
| Flat embroidery overview | Smooth, flush surface where stitches sit close to fabric; traditional/conventional approach. |
| Stitch coverage | Satin, fill, and running stitches cover the area with minimal height. |
| Stabilization | Proper stabilizer prevents puckering; crucial for dense fills especially on knits. |
| Thread choices | Cotton, polyester, or rayon; color selection drives mood and design. |
| Care & longevity | Flat surface wears well; suitable for everyday garments and upholstery. |
| Comparative analysis: visual impact | 3D offers bold, eye-catching texture; flat provides a classic, low-profile look. |
| Comparative analysis: fabric compatibility | 3D works on sturdy fabrics; flat performs across many fabrics with less bulk. |
| Comparative analysis: maintenance | Flat easier to care for; 3D may require gentler washing/ironing. |
| Comparative analysis: design complexity | 3D may struggle with small text; flat handles fine details better. |
| Comparative analysis: budget & time | 3D involves more steps and cost; flat can be more economical for simple designs. |
| When to choose | Refer to design goals, fabric, care, and budget; 3D for bold branding and accents; flat for durability and simplicity. |
| Practical tips | Use appropriate stabilizers; manage hoop tension; plan color and test sew; provide care instructions. |
| Common mistakes | Uneven height, puckering, shadowing, color misalignment; plan stitch order and underlay carefully. |
Summary
HTML table above summarizes key points about 3D embroidery vs flat embroidery from the base content. The table highlights definitions, techniques, materials, project suitability, care, and common pitfalls to help you decide which method fits your design goals.